On this page
Activating Your License ★ Publisher
Once you purchase a Publisher plan, you'll receive a license key by email. Follow these steps to activate it in Breaking News Studio.
-
1
Open Bluesky in Chrome and click the ⚡ bolt icon in the left sidebar to open Breaking News Studio.
-
2
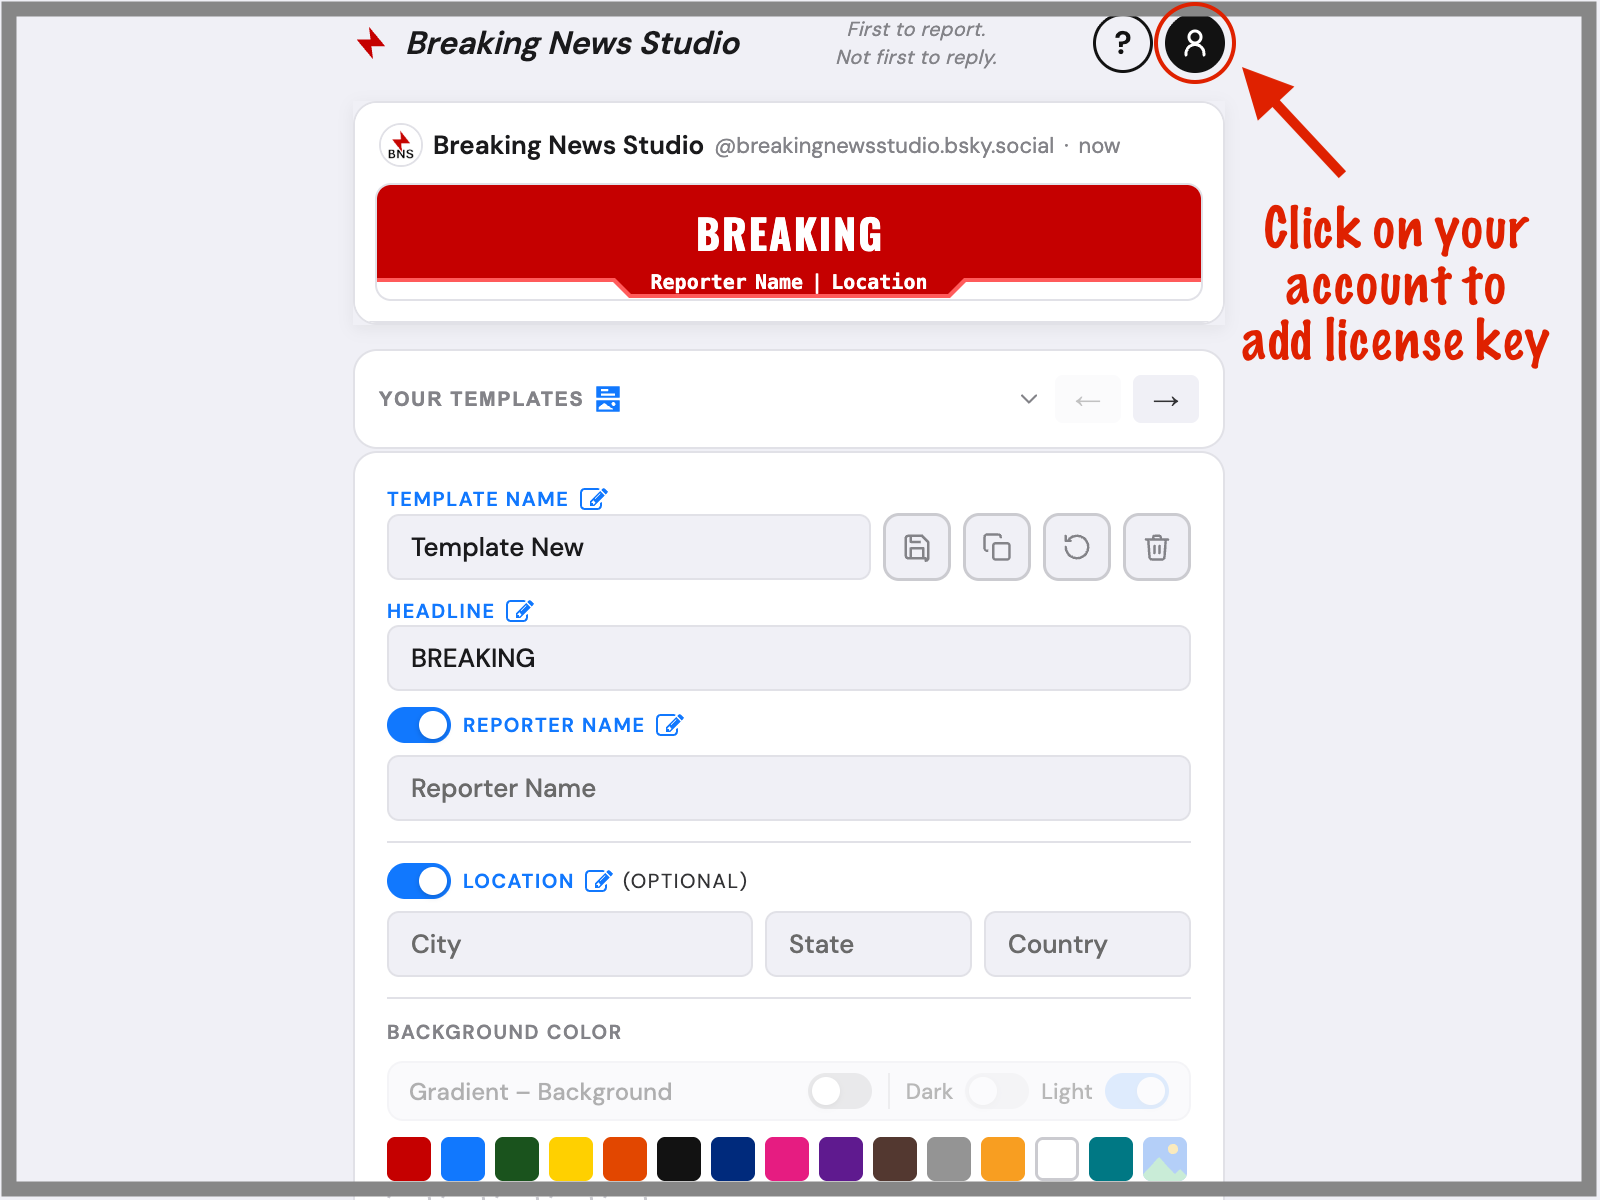
Click the account icon in the top-right corner of the BNS Studio panel to open Account & License.
-
3
Paste your license key into the Publisher License Key field and click Activate.
-
4
You'll see "License activated — welcome to Publisher!" and your plan will update immediately. Your license key is valid for up to 2 devices.
Installing the Extension
Breaking News Studio installs as a Chrome extension in seconds. No account or sign-in required.
-
1
Click Get the Extension on the BNS website — you'll be directed to the right store for your browser automatically.
-
2
Click the install button on the extension listing page.
-
3
A confirmation dialog will appear — click Add extension to complete installation. A confirmation notification will appear when it's done.
-
4
Open your Bluesky account. Look for the BNS bolt icon in the left sidebar, between Saved and Profile. Click it to launch the extension and build your first banner.
Your Templates
Templates are saved banner designs you can switch between instantly. Build a library of designs for different story types — breaking news, sports, weather, and more.
- Click the arrow next to "Your Templates" to expand your saved banner list.
- Highlight a saved banner and use the arrows to reorder it in your list.
- Click the "+" button to create a new template.
- Use the save, copy, revert, or delete icons to manage each saved banner.
- Banners saved here automatically sync to your Image Builder.
Template limits: Reporter plan includes up to 3 saved templates. Publisher plan or higher includes unlimited templates.
Headline & Byline
Set your banner's primary text and optional attribution information.
- Template Name: Give your banner a name for easy reference in your saved list.
- Headline: The breaking news tagline that appears on the banner (e.g., BREAKING, DEVELOPING STORY, WEATHER ALERT).
- Reporter Name (optional): Toggle on to display your name below the headline in the byline.
- Location (optional): Toggle on to add your city, state, and country to the byline.
Background Color
Choose from preset swatches or dial in an exact shade with the color wheel.
- Click any "+" box in the Background Color section to open the color picker.
- Select from preset swatches or use the full color wheel for a custom color.
- Gradient Background ★ Publisher — Toggle on to apply a vertical gradient across the banner background.
- Custom Image Background ★ Publisher — Upload your own image as the banner background (1600 × 400px, 4:1 Ratio recommended).
Font Settings
Control the typeface, color, style, and size of your headline text.
- Click any "+" box in the Font Color section to open the color picker.
- Gradient Font ★ Publisher — Toggle on to apply a vertical gradient to your text color.
- Use the font dropdown to choose your typeface (default: Oswald).
- Bold and Italic are available on all plans.
- Underline and Outline ★ Publisher — Additional text styles available with Publisher plan or higher.
- Use the size slider to adjust the font size of your headline.
Icons
Icons appear on the left and right sides of your banner, adding visual context to your story type.
- Icon Color Mode: Choose Apply to all to use one color across all icon slots, or Apply individually to style each separately. "Apply to all" is recommended for beginners.
- Click an icon box — it highlights with a blue border — to open the icon picker for that slot.
- Browse icons by category: General, Sports, Weather, Finance, Politics, Science, School.
- Click the red X on an icon slot to remove it, giving your headline more horizontal space.
- Click the faded blue + to restore a removed icon slot.
- Upload Custom Icon ★ Publisher — Upload your own icon, logo, or image (400 × 400px, 1:1 Ratio recommended).
- Emoji ★ Publisher — Pick an emoji from the Emoji tab for a colorful, expressive icon.
- Use the color wheel at the bottom of the Icon section to set icon color.
Using the Image Builder
The Image Builder lets you combine your banner with a photo into a single merged image — ready to post directly to Bluesky.
Opening the Image Builder
- From your Bluesky compose window, click the Image Builder icon in the toolbar — the red square icon at the bottom of the composer.
Selecting a Banner
- Your saved templates appear in the left column. Click any banner to load it into the preview window.
- The Merged toggle (on by default) combines your banner and photo into one image. Keep this on — toggling it off creates two separate images and is not recommended.
- Click Remove banner × to clear the current banner selection.
Adding a Photo
- Click "+ Add Photo" in the preview area, or drag and drop an image directly.
- For best results, use Bluesky's recommended image dimensions.
- Once added, the banner and photo merge together automatically.
- Use ↑ Top or ↓ Bottom to position the banner above or below the photo (Top is the default).
- Use Remove banner ×, Change photo, or Remove photo × to adjust at any time.
Adding to Post
-
1
Click Add to post. Your merged image is sent to the Bluesky compose window.
-
2
Add your post text in the compose window as you normally would.
-
3
Click Post to publish to your Bluesky feed.
Tip: After clicking Add to post, look for the small blue dot on the Image Builder icon in the composer toolbar. It confirms your banner is successfully attached — even if Bluesky's preview crops the image and the banner isn't visible yet.
Banner-Only Posts
You don't need a photo to post with BNS. A banner by itself makes a clean, high-impact post.
- In the Image Builder, select a banner and click Add to post without adding a photo.
- In the Bluesky compose window, the banner will appear as a default thumbnail and may look cropped — this is normal.
- The banner displays correctly once published to your Bluesky feed.
- Banner-only posts automatically fill in the sides of the byline area with a slightly less opaque version of the banner background color.